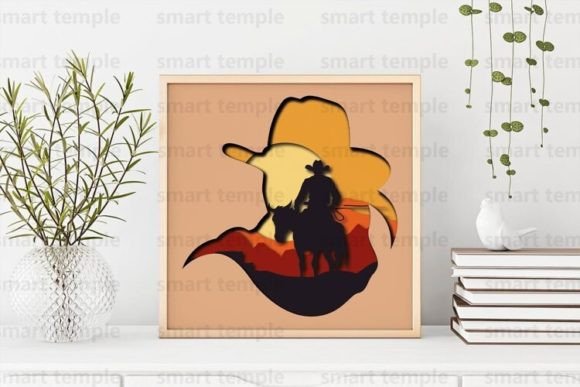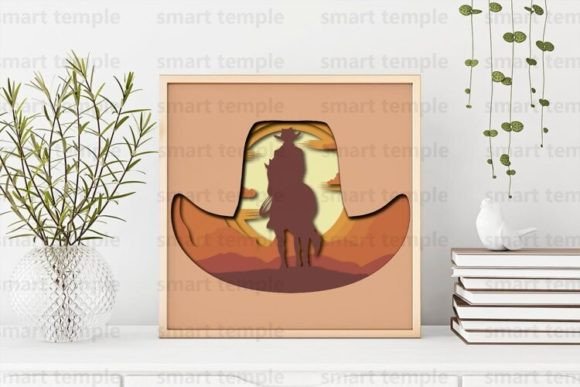
Crafting the Perfect Cowboy Hat 3D Shadowbox: A Guide to Using Your SVG Files
The rustic charm of the American West has found a new home in modern interior design through layered paper and wood art. If you have recently purchased a Cowboy Hat 3d Shadowbox design, you are holding more than just a digital file; you possess a blueprint for a striking piece of wall decor. Whether you are a seasoned crafter with a laser cutter or a beginner using a Cricut or Silhouette machine, understanding how to properly utilize these layers is essential for achieving a professional finish. This guide will help you navigate common pitfalls and ensure your final product looks polished, durable, and ready for display or sale.
Understanding the Versatility of Your Digital Assets
Before you begin cutting, it is crucial to recognize what you have acquired. The archive you downloaded contains a set of meticulously organized layers designed specifically for CNC machines, laser cutters, and electronic cutting devices like the Cricut or Silhouette. These files come in versatile formats including SVG, DXF, and AI, ensuring compatibility with almost any software you prefer.
Many users mistakenly believe these designs are rigid and unchangeable. In reality, the strength of a well-made Cowboy Hat Svg lies in its editability. You can resize the entire composition to fit a small frame or a large statement wall piece. However, this flexibility requires caution. Resizing without checking line weights or bridge thicknesses can lead to fragile pieces that break during weeding or assembly. Always preview your design at 100% scale in your software before sending it to the machine.
Material Selection: Avoiding Common Structural Mistakes
One of the most frequent errors creators make is choosing the wrong material for the intended depth and durability of the shadowbox. The design supports various mediums, including wood, plywood, cardboard, and paper. Each material behaves differently under the blade or laser.
- Paper and Cardboard: Ideal for beginners and those without access to heavy machinery. These materials are easy to cut and paint but lack structural rigidity. If you choose paper, ensure you use high-quality cardstock (at least 80lb) to prevent warping when glue is applied.
- Wood and Plywood: These provide a premium, tactile feel and are perfect for selling finished products. However, they require precise machine settings. Using plywood that is too thin may result in burn marks from laser cutters, while wood that is too thick may not fit standard shadowbox frames.
A critical oversight is ignoring the grain direction in wood or the fiber direction in cardboard. Cutting against the grain can cause edges to fray or layers to split. Always align your longest continuous cuts with the grain to maintain structural integrity. If you are unsure, perform a test cut on a scrap piece of your chosen material. This small step saves time, material, and frustration.
Painting Techniques for Depth and Durability
Once your layers are cut, the transformation begins with painting. A common misconception is that one coat of paint is sufficient for a clean look. For a Cowboy Hat 3d Shadowbox, depth is created not just by layering, but by the uniformity of color. Uneven paint application highlights imperfections in the cut edges and distracts from the silhouette.
To achieve a professional finish, use acrylic paint and apply 3-4 thin coats rather than one thick layer. Thick paint can fill in intricate details, blur sharp edges, and add unnecessary weight that might cause layers to sag over time. Allow each coat to dry completely before applying the next. This patience ensures a smooth, matte finish that looks high-end. If you plan to sell these items, consider sealing the paint with a clear matte varnish to protect against dust and handling damage.
Navigating Licensing and Commercial Use
For entrepreneurs and small business owners, understanding the licensing terms is non-negotiable. The purchase of this digital design grants you the right to create physical products and sell them. You can craft these shadowboxes, paint them, and list them on Etsy, at local craft fairs, or in your boutique. This is a valuable opportunity to generate income from your creativity.
However, there is a strict boundary you must not cross. It is forbidden to resell this design in digital form. You cannot share the SVG, DXF, or AI files with others, nor can you post them on other websites, free download platforms, or social media groups. Doing so violates intellectual property rights and undermines the work of the designer. Additionally, avoid claiming the design as your own original creation. Transparency with your customers about using licensed designs builds trust and protects your business reputation.
Troubleshooting File Formats and Customization
Technology can be unpredictable. You might open your archive and find that your specific software does not support the provided formats, or perhaps you need a different vector format for your industrial CNC router. Do not panic. The designer offers support for these exact scenarios. If you did not find a file format that suits you, or if you need a specific adjustment, reach out directly. Most designers are willing to help convert files or provide guidance on how to import existing formats into your preferred software.
When editing the files, keep the layer hierarchy intact. The Cowboy Hat Svg is structured so that each layer corresponds to a specific depth in the shadowbox. Accidentally merging layers or deleting a spacer piece can ruin the 3D effect. Before making significant edits, save a backup copy of the original file. This safety net allows you to revert changes if an experiment goes wrong.
Final Assembly and Presentation Tips
The final step is assembly. Use a strong, fast-drying adhesive suitable for your chosen material. For paper, a precision glue pen works wonders; for wood, a clear-drying craft glue or epoxy is better. Apply glue sparingly to avoid seepage, which can stain visible surfaces. Align each layer carefully, using the registration marks if provided, or by eyeing the symmetry of the hat brim and crown.
Once assembled, hang your creation on the wall or gift it to a friend who appreciates Western aesthetics. The layered shadows cast by the hat’s brim create a dynamic visual that changes with the lighting in the room. By avoiding the common mistakes of poor material selection, rushed painting, and licensing violations, you ensure that your Cowboy Hat 3d Shadowbox is not just a craft project, but a lasting piece of art. Take your time, respect the design, and enjoy the process of bringing this digital concept into the physical world.