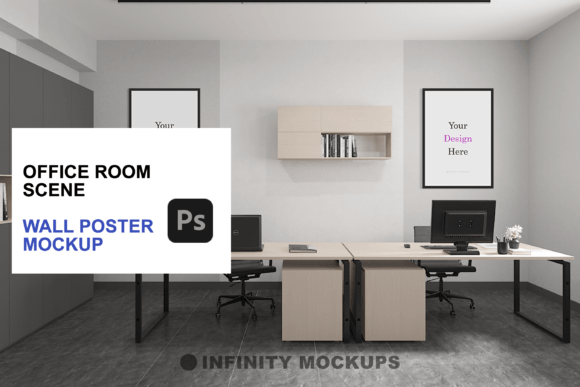
Office Room Realistic Frame Mockup: A Practical Guide to Professional Presentation
Presenting digital artwork in a way that feels tangible and grounded is one of the most challenging aspects of graphic design. Whether you are a freelance illustrator, a marketing manager for a small business, or an entrepreneur launching a print-on-demand store, the gap between a flat JPEG and a photorealistic display can determine whether a client says yes or no. This is where the Office Room Realistic Frame Mockup becomes an essential tool in your workflow. It is not merely a decorative background; it is a bridge between your creative vision and the client’s imagination.
Many creators underestimate the psychological impact of context. When a potential buyer sees a poster floating in white space, they have to work hard to visualize how it fits into their life. However, when that same poster is displayed in a meticulously rendered office environment, complete with natural lighting, subtle shadows, and realistic textures, the mental effort disappears. The product feels real, accessible, and desirable. Yet, despite the clear benefits, many users stumble when selecting or applying these assets, often resulting in presentations that look artificial or unprofessional.
Understanding the Value of Contextual Realism
The core appeal of an Office Room Realistic Frame Mockup lies in its ability to simulate reality. These tools are typically built using high-resolution 3D renders or professional photography, layered with smart objects in Photoshop. This allows you to drop your design into a predefined area, and the software automatically applies perspective, lighting adjustments, and shadow effects. The result is a seamless integration that mimics how light interacts with paper, ink, and glass.
For professionals, this efficiency is invaluable. Instead of spending hours setting up a physical photoshoot—which requires lighting equipment, camera gear, and physical prints—you can generate dozens of variations in minutes. This speed allows for rapid A/B testing of different designs, frame colors, and orientations. However, the ease of use can sometimes lead to complacency. Just because a mockup is labeled "realistic" does not mean it will automatically look good with your specific design. Understanding the nuances of lighting and perspective is crucial to avoiding common pitfalls.
Common Mistakes That Undermine Your Presentation
One of the most frequent errors designers make is ignoring the lighting direction. In a high-quality office room scene, light usually comes from a specific source, such as a window or an overhead lamp. If your original artwork has flat, uniform lighting but the mockup environment features strong directional shadows, the final composite will look disjointed. The poster will appear to be "stuck on" rather than hanging naturally in the space. This disconnect breaks the illusion of realism and can make even the best artwork look amateurish.
Another overlooked detail is the resolution mismatch. Many beginners download low-resolution previews or use web-sized images for their smart object layers. When these are scaled up to fit a large frame in a 4K mockup file, pixelation occurs. This is particularly noticeable in text-heavy designs or intricate illustrations. The result is a blurry, unprofessional presentation that fails to convey the quality of the actual product. Always ensure your source files are at least 300 DPI and match the dimensions of the smart object layer before placing them.
Additionally, users often neglect the frame selection process. The Office Room Realistic Frame Mockup typically includes multiple frame styles, such as black, white, wooden, and custom color options. Choosing a frame that clashes with the room’s decor or the artwork’s tone can distract from the main subject. For instance, placing a vibrant, modern abstract piece in a heavy, ornate wooden frame within a minimalist office setting creates visual confusion. The frame should complement the art, not compete with it.
How to Avoid Pitfalls and Enhance Quality
To ensure your final output is polished and persuasive, start by analyzing the light source in your chosen mockup scene. If the shadows in the room fall to the left, consider adding a subtle gradient overlay or adjusting the brightness/contrast of your artwork to mimic that same light direction. Most advanced mockups include a "fade effect" layer or blending mode adjustments. Use these features to soften the edges of your design, allowing it to blend naturally with the texture of the paper or canvas. This small adjustment can significantly enhance the perceived depth and realism.
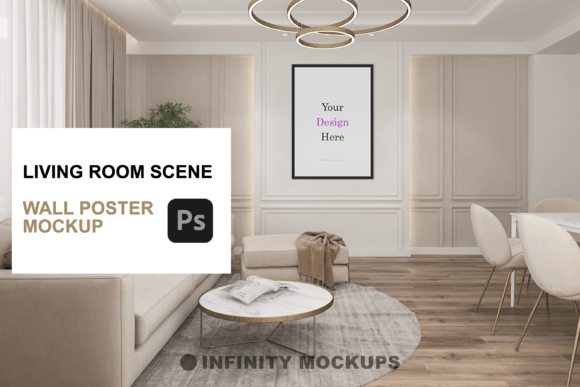
When selecting a frame, think about the target audience and the intended environment. If you are selling to corporate clients, a sleek black or white frame in a clean, modern office scene may resonate more effectively. For home decor or artistic portfolios, a warm wooden frame in a cozy, sunlit room might evoke a stronger emotional response. The variety of included frames—square, rectangle, and horizontal—allows you to tailor the presentation to the aspect ratio of your artwork. Do not force a vertical design into a horizontal frame; instead, choose the shape that respects the composition of your original piece.
It is also wise to utilize the custom color feature if available. This allows you to match the frame color to specific brand guidelines or interior design trends. By tweaking the hue and saturation of the frame layer, you can create a cohesive look that ties the artwork to the surrounding environment. This level of customization demonstrates attention to detail and professionalism, which can be a deciding factor for high-end clients.
What to Check Before You Buy or Download
Before committing to a specific Office Room Realistic Frame Mockup, verify the technical specifications. Check the file size and resolution. A high-quality mockup should be at least 3000 pixels on the shortest side to allow for large-format printing or high-definition screen displays. Look for non-destructive editing capabilities, such as smart objects and adjustable layer styles. This ensures you can make changes without permanently altering the base image.
Review the included tutorials or documentation. A well-supported product will offer a video tutorial or a detailed PDF guide that walks you through the process of replacing the artwork, adjusting shadows, and changing frame colors. This is particularly helpful for beginners who may not be familiar with Photoshop’s advanced features. The presence of a video tutorial indicates that the creator values user experience and wants to ensure you get the best results possible.
Finally, consider the versatility of the scene. Does the office room look too specific? If the decor is overly trendy or cluttered, it may date quickly or limit the types of artwork you can display. Ideally, the background should be elegant and neutral enough to let your design shine, yet detailed enough to provide context. Look for scenes with balanced composition, where the frame is the focal point but the surrounding elements add depth and atmosphere.
By approaching the Office Room Realistic Frame Mockup with a critical eye and a focus on technical precision, you can elevate your portfolio and marketing materials. Avoid the temptation to rush the process. Take the time to adjust lighting, select appropriate frames, and ensure high-resolution inputs. These small efforts compound to create a professional, convincing presentation that resonates with your audience and drives engagement. In a competitive digital landscape, the difference between a good design and a great presentation is often the attention to these realistic details.